Saturday, 26 April 2014

Amazing Lemon Drizzle Cake

I am so very happy I found this recipe. I have never tried to make Lemon Drizzle Cake before so I was doing some research and looking for a good looking recipe. This recipe is apparently from Nigella Lawson originally but I found it on 'Bake & The City' a blog I have recently come across which I love. Her name is B, she lives in London, and collects recipes in an envelope of everything she wants to bake - just as I do. We also have another similarity - her partner also isn't a massive baked goods fan and rarely eats what she bakes - I also have this problem which leads to me eating the whole batch - how terrible. This Lemon cake however he adores! This recipe caught my eye because of the lemon syrup you pour into the tin as soon as the cake comes out of the oven which makes a gorgeous crisp sugar glaze coating all over the cake when it is cooled and removed from the tin.


I followed this recipe exactly and it is perfect - it doesn't need a single thing changing. 
So, you will need:
5x9in Loaf Tin
125g Unsalted Butter
175g Caster Sugar
2 Large Eggs
Zest of 1 Lemon
175g SR Flour
Pinch of salt
4 Tablespoons Milk (I used whole milk)
I added some Poppy Seeds too

Syrup:
Juice of 1 1/2 Lemons
100g Icing Sugar

Drizzle:
Juice of 1/2 Lemon
150g Icing Sugar

Line your loaf tin with baking paper and grease with butter 
Preheat oven to 180 C
I used my stand mixer to cream together the butter and sugar then add the zest and the eggs - beat in well
Gently fold the flour and salt into the mixture - mix thoroughly and add the milk and poppy seeds and mix thoroughly again.


Pour the mixture into your tin and bake for 45 minutes - In my oven 45 minutes exactly was perfect.

When your loaf has 5 minutes left in the oven, gently heat the syrup ingredients in a saucepan until the sugar has dissolved.

When the cake comes out of the oven - puncture holes all over the loaf with a skewer or toothpick and poor the syrup over the loaf - it may seem a lot but it will soak in and doesn't make the sponge wet.


Leave the cake to cool completely before removing from the tin.

When your cake is cool, combine the drizzle ingredients in a bowl until smooth - I then put the icing into a freezer bag, gathered it all into one corner and snipped the corner off to make a piping bag. Then drizzle!! 


Iced Easter Muffins

Yes, iced muffins... Muffins are, in fact, exceedingly good when they're iced, or maybe that's just me having an addiction to butter frosting? Anyway I used my muffin recipe because I prefer it to any cupcake recipe I have come across - (I'm not actually a HUGE cupcake fan - but they are just so pretty). Obviously these little gems needed to be iced and decorated because it's Easter and I searched the whole of the county to find Mini-Eggs so close to Easter Sunday. (Next year I am going to stock up when they hit the stores in February!)


Ok, this muffin recipe is my absolute favorite - it's from Bakerella and when I stumbled upon it I had to try it - I have never found a muffin recipe that taste's and feels like proper muffins. I have converted the measurements into grams and ml for us English folk who don't use US cups!


So, if I am using regular cupcake cases this recipe makes 12 and if I want proper, huge, gorgeous muffin sized muffins it makes 9. (These Easter cakes are the larger variety)


You will need:
192g Plain Flour
100g Sugar
1 1/2 Teaspoons Baking Powder
1/2 Teaspoon Salt
177ml OR 175g Sour Cream
60ml Milk
2 Eggs
2 Teaspoons Vanilla Extract 
57g Unsalted Butter melted and cooled slightly
150g Chocolate Chunks

Preheat your oven to 180°
In a bowl (not your KitchenAid bowl) sift the dry ingredients and combine


In a Stand Mixer or separate bowl stir wet ingredients until combined.


Add the dry ingredients to the wet and combine.


Add your chocolate chunks - I find a mix of white and dark is THE best combination but of course you can add whatever you fancy to muffins.


I bake them for 18 minutes but this will vary with your oven, usually 18-20 minutes - keep an eye on them


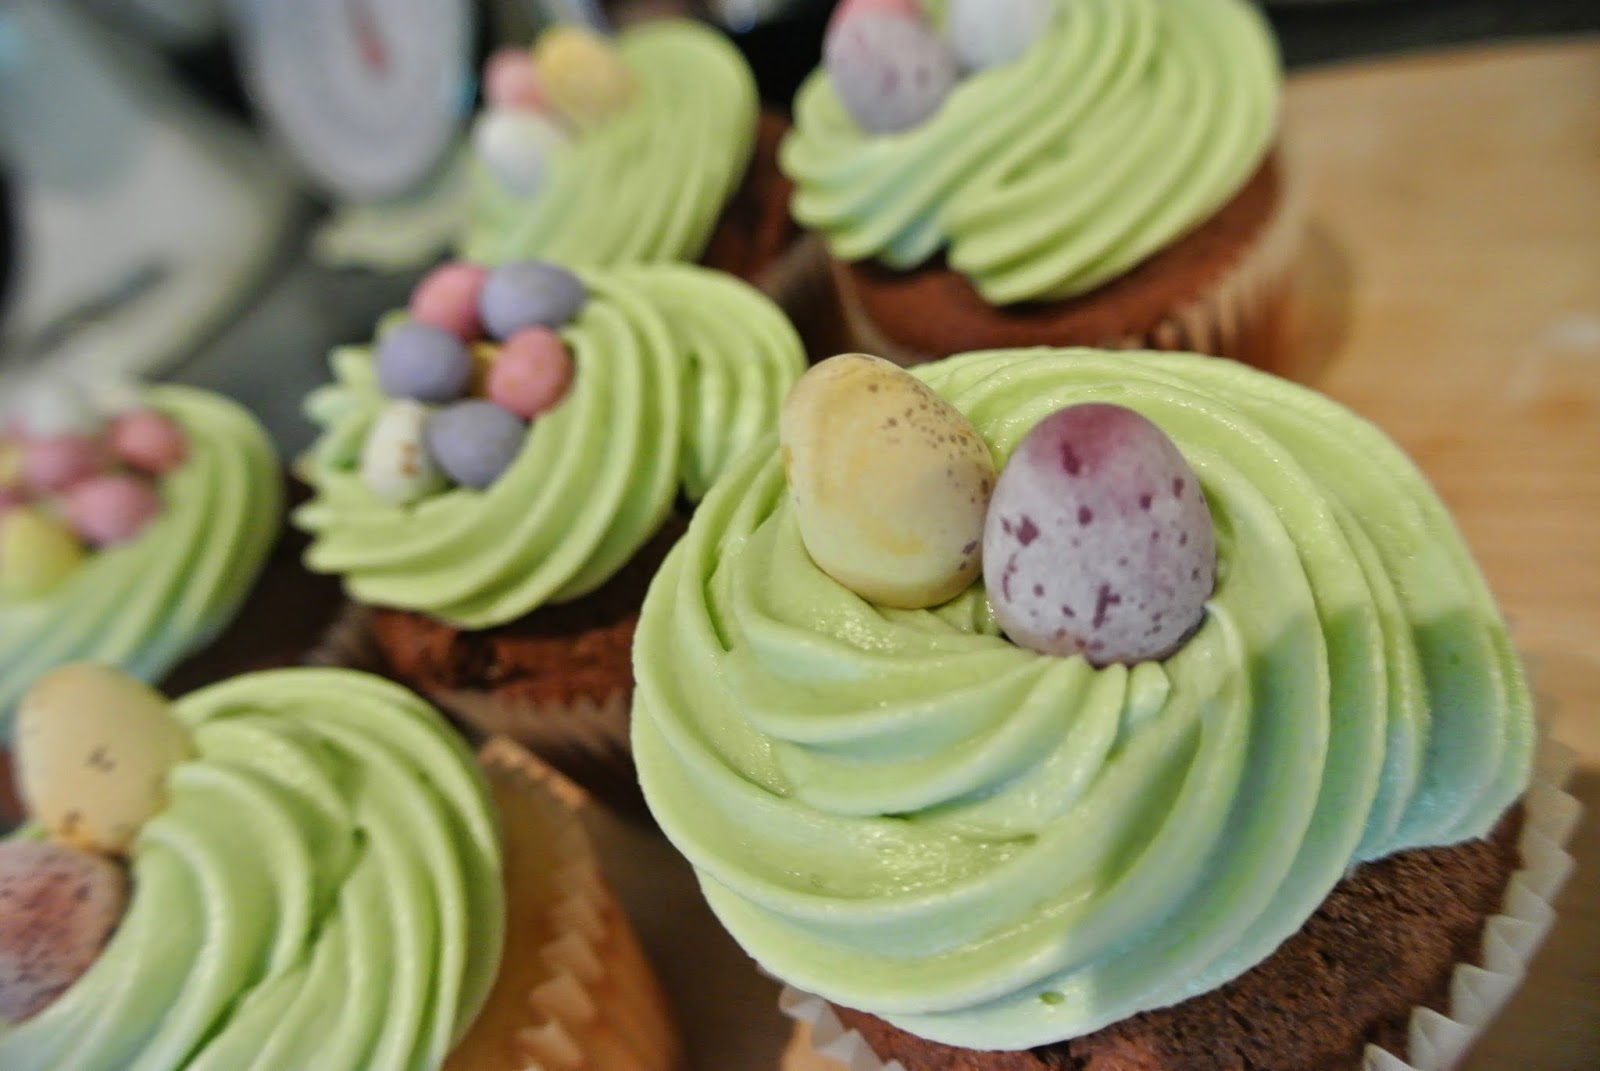
Yes muffins are fabulous like this, hot out of the oven but like I said it's Easter and that means Mini-Egg decoration...


For the Frosting - I just used buttercream, I don't have a recipe I use for buttercream because I think it completely depends how you like it - and what it is going onto. If you like it light and fluffy - make sure you cream the butter for a good 5-10 minutes in a stand mixer. If you like it more solid and crunchy - keep your cakes in the fridge (I love icing straight from the fridge) If you it rich - add some melted chocolate and cream with the butter and icing sugar. I usually add a tablespoon or two of full fat milk too.


And these are my Iced Easter muffins with plenty of frosting and Mini-Eggs - Heaven.


Saturday, 19 April 2014

The strangest Swiss rolly kind of cake ever

This is a strange one - I wanted to try and re-create the white sponge with glace icing and sprinkles we had at school, a request from Joel. So I started researching into how to make a very light, plain sponge - this cake didn't have much flavor but it is just great and makes me feel all nostalgic. I found a recipe on another blog which looked very interesting - the method was so whacky I just had to try it. The result wasn't exactly what I had imagined, firstly, I remembered when I got it out of the oven that this cake is more of a tray bake anyway - I had just baked mine in a round tin... Secondly, it tasted like Swiss Roll sponge - which I do really like and with the icing poured on top and some fabulous sprinkles I am thoroughly enjoying making my way through this sponge this evening, on the eve of Easter Sunday.
The method - This is what drew me in, (and the fact it uses 6 eggs!) you mix the yolks and other ingredients together and set aside. You then whisk the egg whites and sugar - like meringue, to form soft peaks.

You then fold the meringue mixture into the yolk mixture and bake. This recipe is definitely one to experiment with - it has intrigued me.


Anyway if, for some reason you want to give this sponge a go and taste the weirdness - I followed the recipe exactly from Colleen's page Heavenly Palate. There is a strong possibility that I did something wrong but who knows - I still like it and here is how mine turned out. - For the icing, I just used a simple Glace icing - Mix sifted icing sugar with a few teaspoons of boiling water and mix and pour over the cake.


Digestive Biscuit Chocolate Bars HELLO

As soon as I found this recipe a few months ago I just thought of my dad, he loves chocolate and biscuits - combined is even better. I needed to make him something this week to say thank you for helping me sell my car - another mid week bake I know (so much for only baking at the weekend!) Anyway these are super simple and would be great to whip up as a gift or to take to a party or afternoon tea with friends. This recipe is taken from Good Housekeeping - I have adapted the method slightly and once again I have substituted the melted chocolate for melted chocolate flavored cake covering just for a softer bite.

Prep - 
Grease and line a 20cm tin


You will need - 
  • 50g Cocoa powder - sifted 
  • 3tbsp Golden syrup
  • 225g Unsalted butter
  • 300g Digestive biscuits
  • 300g Chocolate flavored cake covering - I used white and dark but use whatever you fancy!
1. Melt the Cocoa powder, Golden Syrup & Unsalted butter in a saucepan over a low heat.


2. Crush the digestive biscuits in a freezer bag with a rolling pin or meat tenderizer - add the crushed biscuits to the butter syrup mixture and mix well.


3. Put  the mixture into the tin and push down so it is compact with a potato masher and chill for 30 minutes.

4. Melt the chocolate cake covering in the microwave in 30 second blasts so you do not spoil it and pour over the biscuit base. Chill until set.

5. When set, remove from tin and cut into chunky squares and Enjoy!


Millionaire WOW

Well, I am impressed. I have never attempted Millionaire Shortbread because it scared me - the layers, the caramel, AHH. Until now. I had friends come over last weekend and wanted something impressive and oh so tasty, so I thought I would give them a go. This recipe is a little bit of a cheat - it uses shop bought shortbread mixed with melted butter for the base (like cheesecake) but as I have never baked shortbread I didn't want to go wrong at the first layer, so for me, this was perfect. Anyway the impressive and oh so tasty criteria was accomplished as I have had several requests for another batch just 4 days later. - that's when you know something is good. By now you probably know I'm a sweet/chocolate/gooey-aholic - the sweeter and richer the better for me - so, millionaire shortbread, WINNER.


The recipe I used was from the actual Carnation website but I have adapted it after trying it last weekend - I found there wasn't a thick enough shortbread base and too much caramel - as you can see from the picture above. I have also used 'Cake flavored covering' on the top as I remember trying a few homemade millionaire shortbread's and the melted chocolate on top is so hard, it hurts your teeth and obviously the layers all crumble whilst you are trying to get through the chocolate and you end up in a big, crumbly, sticky mess.

Prep -
Grease and line a 20cm square tin. I used a metal tin rather than silicone because this needs to set and be moved around so it needs to be sturdy.

You will need -

  • 20cm Square tin
  • 375g Shortbread biscuits
  • 82.5g Unsalted Butter
  • 300g Dark or Milk Chocolate flavored cake covering (I just used Tesco own brand - it's fab)
  • 100g White Chocolate flavored cake covering
Depending on how much caramel you want in them: if you want quite a lot, like the picture above - 
  • 150g unsalted butter
  • 150g dark brown soft sugar
  • 397g can Carnation condensed milk
If you do not want a lot of caramel I would either half these quantities or make the whole batch but only pour however much you want into the tin - I'm sure you can find a use for the left over caramel... (like eating it all out of the bowl in front of the tv)


1. Melt the butter (82.5g) in a saucepan gently, over a low heat. Put the shortbread biscuits in a freezer bag and bash them with a rolling pine until you have fine crumbs (lumps will make the base crumble). Put your crushed shortbread in with the melted butter - away from the heat, mix together until all the shortbread is coated.

2. Press the shortbread mixture into the tin and smooth over - I use a potato masher to get a nice even layer. Chill for 20-30 minutes.

3. Gently heat the dark brown soft sugar and unsalted butter (150g) in saucepan constantly stirring until melted. Add the condensed milk and bring to a rapid boil, again stirring continuously. Cook for around 1-2 minutes until the mixture has thickened. Pour your caramel over the shortbread base, cool, and then chill until set - I left it for a couple of hours.

4. Melt the dark/millk and white chocolate flavored cake covering in separate bowls in the microwave in 30 second bursts to make sure you do not spoil it. Pour the dark/milk covering over the caramel - it should fall to the sides and even out on its own. Then drop teaspoon sized blobs of the white into the dark - about the size of a 2 pence piece. Using the handle of a spoon, swirl the white blobs into the dark to get the marbled effect and chill until set.

5. Remove from the tin and cut into squares - use a knife that has been dipped in hot water and dried if you have trouble getting through the chocolate.

ENJOY!


Not birthday cake, birthday brownies..

So, it was Joel's brothers birthday last week - which meant a mid week bake (YAY), BUT he was going away for the Easter break so I couldn't make him a cake unfortunately. I went with Brownies, everyone loves brownies, they are easy to transport and are the richest, gooey-ist things going - which is always good in my books. I really love Jamie Oliver's brownie recipe - I have never tried any other since finding it, but I do intend to - I have a few I want to try, which I will share. This recipe always seems to work and they taste divine. Of course I have adapted it slightly but you can add ANYTHING to brownies and they just get better - for these brownies I stuck to plain as they were for a little one.

You will need:
  • 20-24cm square tin
  • 200g Good quality dark chocolate - I would recommend using 70% or higher for these
  • 250g Unsalted Butter
  • 80g Cocoa Powder - I tend to use Bourneville or Green & Blacks
  • 65g Plain Flour
  • 1 tsp Baking Powder
  • 360g Caster Sugar
  • 4 Large Eggs
And then you can add anything you fancy - a few things I like to add:
  • Nuts - walnuts or hazelnuts usually
  • Glace cherries - I have a weekness for these things
  • Desiccated or chunks of coconut
  • White Chocolate chunks - there is no such thing as too much chocolate
  • Marsh mellows - great straight from the oven as they are all gooey and sticky 
  • A bag of your fave chocolate sweets - M&M's, Smarties, Minstrels etc..

Okay so, PREP: 

Preheat oven to 180° - Jamie say's to use a 24cm tin but I use a 20cm as I like them thicker, so grease and line a tin size to suit your brownie preference.

1. In a bowl (I used my Kitchenaid bowl) sift the Cocoa Powder, Flour, Baking Powder & Sugar and mix together.


2. In a seperate bowl whisk your eggs


3. Gently melt the butter and chocolate in a bowl over simmering water in a saucepan - make sure the bowl isn't touching the water. Once melted, you can add your extras (cherries/nuts/chocolate) and mix together.


4. Add the chocolate and butter mixture into the flour and sugar mixture - mix together well. Then add your whisked eggs, mix in until the mixture looks smooth and silky.


5. Pour the mixture into your prepared tin and bake - Jamie say's bake for 25 minutes but as I used a smaller tin I bake for around 35-40 minutes. After they have been in for 25 minutes, keep checking them every 5 minutes with a cocktail stick - like with cakes you don't want this stick to come out completely clean - you need to keep them gooey in the middle!

6. Let them cool in the tin otherwise it will crack and break if you remove them hot. When cool - chop them into chunky squares.

Enjoy your rich gooey brownies!


Wednesday, 9 April 2014

Big Up Bloggers!

Fellow bloggers are what got me into baking. Well, back in to baking. I used to love baking when I was a child with my mum but soon fell out of love when I thought I couldn't do it - my bakes never came out as they should, buying sweets and baked goods seemed easier and tastier. - Now I disagree. When I happened to land on a baking blog when on the internet, I got excited. I spent hours reading about other people's adventures in the kitchen - and the love affair started.
My hands down favourite blog, which I have studied, tried and tested over the last year is Sweetapolita (http://sweetapolita.com/). Rosie - owner of Sweetapolita explores other bakers recipes, adapts them to her tastes and creates and whips up her own. I have Rosie to thank for everything I have learnt, about baking and about myself. I use a lot of Rosie's recipes as a base to my creations as she has many fantastic basic recipes when you unravel the mystical layer cakes she assembles. - Its all about trial and error.
Another blog I love to sit and trawl through is Bakerella (http://www.bakerella.com/) - I have explored many great recipe ideas from Bakerella.
I do tend to prefer American blogs as I just find them more inspiring and extravagant - never afraid to just try. Although I have sometimes had to make adaptations to recipes simply because ingredients differ in America and England.
I am desperate to invest in 'Home Baked Comfort' from Williams-Sonoma, however I am a little short on money after just moving house. Anyway, Bakerella mentions this book in one of the recipes she has published on her website from Michelle Gayer - owner of 'Salty Tart' bakery in Minnesota - (which I am determined to visit in the near future). This recipe is utterly fabulous - there is no other way to describe it, and I want to share it and tell the world (which I will, I promise) This is why the blogging has started...

Hi, Hello, Welcome!

Well, here I am - writing my very own baking blog. When growing up, you are continuously asked what your hobbies and interests are.. I never knew how to answer this question and would often dread it being asked. To this day it still sends shivers down my spine, BUT finally I have found my love and passion - baking and caking. I am a self confessed sweet addict, well, food addict - I am completely head over heels with all things food. However I'm not a huge savoury cook because for me it is quite challenging - it just isn't my passion. That is when I turned to baking. 90% of my days are spent imagining and dreaming up flavour and colour combinations for my next bake - which I keep to the weekends. I eat clean and exercise throughout the week (& dream about cake and cookies) and when it comes to Friday night, I am away - creating and baking, and most importantly: Eating. If I didnt limit myself to weekends there would be no stopping me. Saying that, I think I need the thinking time during the week to go through every step and process and analyse it, so that, hopefully I have my sweet heaven at the weekend.